
Have you ever before asked yourself if you can examine a motherboard prior to putting it right into the computer situation? It is definitely feasible and also suggested to do so. Furthermore, you will certainly have a tough time getting rid of whatever if the motherboard does not activate after constructing whatever inside the computer situation.
To prevent this specific circumstance, many professional computer home builders check the motherboard prior to mounting them in the event.
So without more hold-up, allow us see exactly how you can check the motherboard without a CPU.
Why Is It Necessary to Test Motherboard Without Computer Case?
It can be demotivating when you have actually linked all elements in your arrangement, yet it will not switch on and also you require to get rid of whatever as well as attempt once again. That is specifically why it is constantly advised to check your parts prior to constructing them completely.
Besides this, if you are doing it for the very first time, you will certainly likewise have a tough time attaching them inside the computer situation.
Connecting Motherboard Without CPU Case
If you wish to inspect a feasible defective motherboard, you could intend to evaluate it by transforming it on today. Comply with these procedures to evaluate your motherboard without a CPU instance.
Before You Begin

The very first point you intend to do is position the motherboard on a non-conductive as well as anti-static surface area. Given that this is simply a screening stage, you can basically the motherboard over the wood table.
Current can relocate openly on a conductive aircraft. This can harm the certain motherboard element that touches with the surface area. A wood table functions best to limit the existing circulation.
Connect Internal Components
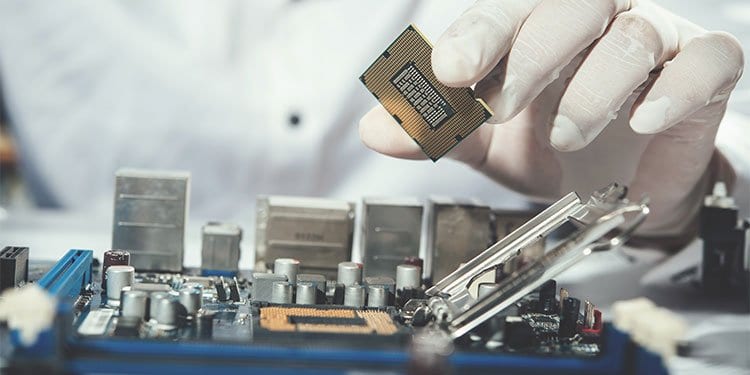
Connect all your interior parts, such as the cpu chip, one RAM stick, and also the graphics card, if you wish to inspect the POST mistake in your screen.
Since this is a screening stage, you can make use of a solitary stick of RAM to transform the motherboard on.
Connect Power Supply
The 24- pin and also the 8-pin (often 4-pin) cords to provide power to the motherboard and also the cpu specifically. You do not require any kind of various other power supply wires, without these 2, the motherboard will certainly not transform on.
However, if you are linking the graphics card, you could require a various power wire for it.
Connect Error Code Speaker

Depending on the motherboard, it could feature a little audio speaker. This audio speaker enters into among the motherboard headers with 4-pins, either called JFP2 or SPK1. If you can not discover this header, please describe the motherboard’s individual guidebook.
Insert POST Card

Since this is simply a screening stage as well as you could not have actually a screen linked, it is suggested that you obtain a POST (Power-On Self Test) Card. If you do have a screen, you can link the motherboard to it as well as obtain the POST mistake code presented on your display.
Therefore, you can neglect this procedure if you currently have a display.
The card goes inside the PCIe port and also shows a mistake message when there is a trouble with the gadget.
When a computer system switches on, prior to getting in the BIOS, the computer system runs the POST examination. This examination checks whether the interior part such as the CPU and also RAM remain in functioning problem.
To place the POST card, straighten the card with the PCIe port on your motherboard. Carefully place the card right into the port.
Connect System Fans

If you are not exactly sure the PSU is providing power to the board, you can examine the system followers. If the followers are not rotating, it shows that there is something incorrect with the power supply or the motherboard itself.
Here’s exactly how to attach the followers to the Motherboard:
- Search for the headers on the motherboard called SYS_FAN1, FAN, and so on
- Align the arrowhead from the follower cable television to the 5V side of the header.
- Gently put the cord right into the header.
Jump Start the Motherboard
Once you attach every little thing, it is currently time to switch on the motherboard. Exactly how do we transform on the motherboard without having the CPU situation linked? Really, it is quite straightforward, as well as all we require is a screwdriver.
Using the screwdriver, you can short circuit the power button situated in the front panel header. If you brief circuit incorrect headers, you might also have a dead motherboard. It is encouraged to be really cautious when you short the pins.
The actions discussed below will certainly direct you with the procedure of activating the motherboard without a CPU situation.
Locate the Front Panel Header
The front panel header on the motherboard attaches to the CPU instance’s power button, LED reset button, and so on. To situate them on the motherboard, look for works such as F_PANEL, JFP1, as well as PANEL. These headers have 10 pins and also lie near the board’s side.
Locate Power Switch

Once you situate the header, examine the numbers composed under it. The pins on one side are even-numbered, as well as the opposite side is odd-numbered. This chooses a lot of motherboard suppliers, such as MSI, Asus, Gigabyte, and so on
Before relocating better, guarantee that you have actually recognized the right power button header.
Short the Power Switch

After finding the power button header, touch these 2 pins with each other utilizing a screwdriver. The motherboard needs to activate. Once it switches on, get rid of the screwdriver.
If the motherboard does not activate, reseat all the interior elements. Make certain that you safeguard the cords from the power supply right into the motherboard as well as attempt once more.
Things to Check When Testing the Motherboard
So what do you inspect when the motherboard switches on without a CPU situation? Primarily, you intend to inspect is the POST mistake codes, beep codes, as well as LED lights. Listed below, we have actually discussed what you require to look for when you switch on the motherboard without the instance.
Check LED Lights

Once you jump-start the motherboard, the initial point you wish to do is look for LED lights. The LED light on the motherboard typically implies something is incorrect with the link. To recognize what the LED light suggests, look for any kind of creating near the LED lights.
The most current motherboards will certainly have a CPU, GPU, RAM, and also BOOT LED lights that suggests a mistake with each part. If you have a CPU LED turn on throughout start-up, the motherboard has a problem identifying or getting in touch with the cpu. The very same additionally chooses the GPU as well as RAM.
Listen to Beep Codes

Secondly, you intend to listen to if any kind of audio originates from the motherboard. Bear in mind the tiny audio speaker that you gotten in touch with formerly? This audio speaker provides us specific beep audios. Each audio stands for a various mistake.
Below, we have actually noted all mistake beep codes with their significance.
Single Beep: BIOS awaiting key-board input 2 Beeps: GPU mistake 3 Beeps: Memory Issue 4 Beeps: Timer Failure 5 Beeps: Problem with cpu 6 Beeps: Keyboard controller Failure 7 Beeps: Virtual Mode Exception 8 Beeps: Error with Display Memory 9 Beeps: ROM (Read Only Memory) mistake 10 Beeps: Cache mistake 11 Beeps: Physical Memory or video clip failing
Check POST Error Codes

If the motherboard switches on with no LED lights or beep codes, it is currently time to inspect the POST card. If the motherboard faces some kind of problem, the POST card presents a mistake code. Making use of these codes, you can determine mistakes in the motherboard.
Check System Fans
If the motherboard does not beep any type of mistake codes or if it does not light any type of LED, examine the system followers. One certain factor we attached the system followers is to examine whether the motherboard is dead or to life.
If the followers are not rotating, there is a possibility that the motherboard is dead. Get rid of the wire that links the followers to the motherboard, return the cord as well as attempt transforming the motherboard once again.
What to Expect When Turning On the Motherboard?
Keeping in mind the elements that you linked, the motherboard needs to not beep any kind of mistake appears, no LED needs to illuminate, as well as lastly, all followers that you linked must be rotating at optimum RPM (Rotation Per Minute).
Finally, if you have actually attached the display to the motherboard, it must not provide any kind of POST mistake message.
What If the Motherboard Does Not Turn on?
If the motherboard itself does not activate, transform the PSU as well as jump-start the motherboard. If it still does not activate, it is suggested to inspect the motherboard making use of a multimeter. Utilizing this, you can examine whether the link in the board is not safeguarded.
Conclusion
Before beginning to put together any type of element without a computer situation, constantly make use of a non-conductive surface area to put computer components. This, as soon as you transform on the motherboard, check for LED lights as well as beep codes.
Finally, if the motherboard switches on, it is currently time to construct them right into the computer situation.
.