
The Ring Doorbell line of cordless video clip buzzers has great deals of practical attributes to make sure that home owners can conveniently set up and also utilize them to see that’s at the door. One issue numerous individuals deal with is simply exactly how to bill the battery that runs the device.
It isn’t as user-friendly as billing your cellular phone, yet with a little method, you’ll have the ability to switch it to as well as from the battery charger in no time at all.
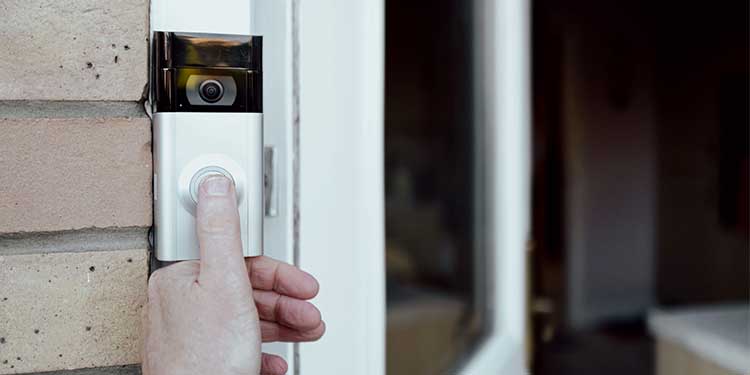
How is the Ring Doorbell Powered
The Ring Doorbell has a rechargeable battery in the system. It is likewise detachable. This battery powers the whole system for the size of its fee time, which is anywhere from months to a year. The Ring Video Doorbell has a 6,100 mAH battery that occupies to 6 hrs to bill.
There are a couple of distinctions concerning billing in between the Ring Video Doorbell and also the Ring Video Doorbell 2. The very first design has an integrated battery that needs the whole system to bill. The more recent design has a battery that can glide out from the buzzer. Customers can buy a 2nd battery to ensure that there is no downtime throughout the billing duration.
Some individuals pick to hardwire the buzzer right into their residence power supply to make sure that it does not need to be billed. Just do this if you have experience with electric job. The old claiming goes that there are 2 type of electrical contractors: excellent ones as well as dead ones. Do not tinker the electric system in your house unless you’re certain you recognize what you’re doing.
How to Charge Ring Doorbell
The whole device needed to be eliminated for the earlier generations of the Ring Doorbell to bill it. For more recent variations, you simply move the battery out as well as bill that by itself. Examine which design you have in the Ring application prior to you start if you aren’t certain what collection of directions to comply with.
- Open the Ring application.
- Press the food selection switch on top left of the application.
- Tap Devices
- Choose your buzzer from the checklist. If there’s greater than one buzzer, make certain you pick the one you’re preparing to bill.
- Select Device Health
- The Product Name shows up under Device Details.

Once you understand which you have, you can begin taking the buzzer cover off to access the system or the battery. You require a T6 Torx screwdriver or the one that Ring consisted of in the initial bundle to access the Ring system under the cover.
Removing the Faceplate
The faceplate is the item that safeguards your Ring Doorbell from the aspects. You need to eliminate it to accessibility either the buzzer or the battery.
- Insert completion of the suitable screwdriver right into the security screw at the base of the Ring Doorbell faceplate.

- Twist the screw to loosen it, making sure not to damage it as you eliminate it. Some versions might have greater than one screw on the base. You will certainly require this screw or the very same sort of security screw to remount the faceplate. You’ll need to obtain a certain substitute without it because Ring alerts that screws can harm the buzzer.
- Place the screws in an area where you can discover them quickly.
- Lift the Ring Doorbell faceplate up as well as far from the system.

Once the faceplate is off, you have accessibility to billing the battery.
Charging the Original Ring Doorbell and also Ring Video Doorbell
Both of these versions call for the whole device to be eliminated from the door and also billed.
- Lift the buzzer up as well as far from the brace that holds it. Depending upon the version, you might require to utilize a screwdriver to get rid of the screws holding it to the brace.
- Plug in the battery charger that featured the Ring Doorbell.

- Plug the various other end of the cord right into the buzzer itself.
- Wait up until the light is strong as well as the battery is totally billed, after that eliminate it from the battery charger.
- Slide the buzzer back right into the placing brace.
- Reinstall the faceplate.
Charging Other Ring Doorbell Models
Other Ring Doorbells consist of a detachable battery to make sure that the whole buzzer does not need to appear of the installing brace.
- Press the tab at the base of the buzzer. This must loosen up the battery.
- Slide the battery out of the device.
- Plug in the battery charger that featured the Ring Doorbell.
- Plug the various other end of the cord right into the battery.
- Wait up until the light is strong, suggesting that the battery is totally billed.
- Remove the battery charger.
- Slide the battery back right into the device up until you really feel a click.
- Reinstall the faceplate.
Your battery must be completely billed, re-installed, and also prepared to function once again.
Confirming the Charge
After the Ring Doorbell is functional once again, you can inspect the fee in the Ring application. Press the switch on the buzzer as well as do a pair of examination runs. The battery sign does not upgrade up until the system remains in location, attached to the network, and also the switch is pushed.
- Press the switch on the front of the buzzer.
- Open the Ring application.
- Tap the food selection symbol at the leading.
- Choose Devices
- Click the access for your Ring Doorbell.
- Choose Device Health
- Look at Battery Level detailed under Power.

You can likewise discover even more info regarding the battery by checking out the Feature Power Usage area. If you favor a longer battery life, readjusting several of the attributes and also choices you’ve chosen could assist extend it.
Other Considerations and also Troubleshooting
Some customers deal with problems when attempting to bill or power their Ring Doorbell. Several of these problems are conveniently repaired.
- Sometimes the battery will not take a cost after being brought within throughout an extremely warm or cool day. The temperature level of the device can affect exactly how it bills. If you’re encountering this trouble, bring the battery or system in as well as establish it down someplace at space temperature level.
Leave it for a couple of hrs to ensure that the battery’s temperature level is a lot more secure. Then, attempt to connect it in once more and also see whether it approves a complete cost. - When your battery has concerns billing or reporting its fee to the application. Doing so can take care of several typical issues. You will certainly have to go via the arrangement procedure once again.
- If your battery is draining pipes really rapidly yet isn’t old or harmed, attempt to transform the movement sensing unit setups on your application. You can readjust it to make sure that it’s basically delicate. Making it much less delicate– specifically if you consistently obtain undesirable notifies– will certainly help in reducing the quantity of battery power it makes use of.
- A bad Wi-Fi or network link can additionally drain pipes the battery life of the Ring Doorbell. If your router is really far or there are all-natural challenges in between the system as well as the router, take into consideration repositioning your networking configuration.
- Sometimes, transforming your router on as well as off can assist the Ring tool attach much more highly.
- The Chime Pro gadget from Ring can aid enhance a weak cordless link due to the fact that among its features is working as a Wi-Fi extender.
- If you have an older router or modem, take into consideration updating it to benefit from even more bands as well as sustained rates.
.