
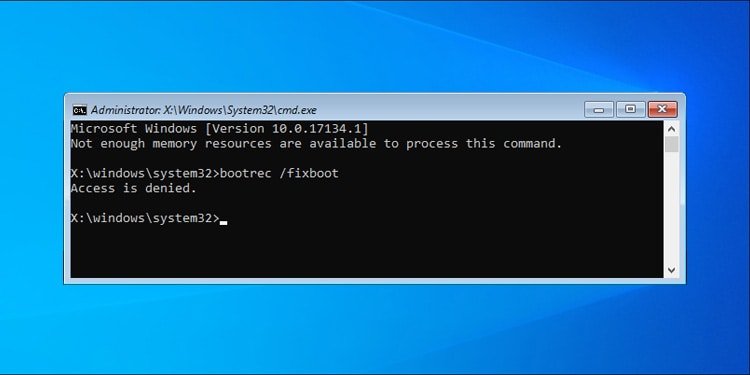
The Bootrec/ FixBoot Access Is Denied mistake takes place when you attempt to fix a UEFI boot loader with this command.
The feature of the FixBoot button is to compose a brand-new boot industry to the system dividers. In UEFI systems, the EFI System Partition (ESP) is unmounted by default. As FixBoot can not access the system dividers, it falls short as well as returns the Access Is Denied mistake.
By designating a drive letter to the ESP, you can efficiently run Bootrec/ Fixboot to fix the boot industry. You’ll likewise discover alternate methods to fix the UEFI boot loader as well as bargain with starting concerns on UEFI systems in the short article listed below.
What Causes Bootrec/ Fixboot Access Is Denied?
The Bootrec.exe device is utilized on Legacy BIOS systems to fix the boot industry. In the instance of modern-day UEFI systems, the system dividing isn’t placed, which is why FixBoot or any kind of various other choices like FixMBR do not function by default. Along with these, various other factors for this consist of:
- Corrupt System Partition
- Windows Version (1707, 1709, 1803)
How to Fix This Issue?
You can utilize diskpart to by hand designate a place indicate the EFI System Partition. After doing so, you must have the ability to utilize FixBoot with no problems. You can rather utilize BCDBoot to fix the EFI Boot Loader.
One even more point to note is that this mistake is extremely usual in Windows variations 1707, 1709, as well as1803 If your computer is running any one of these variations, after that we advise that you make use of Windows Version 1703’s picture to produce a bootable media and also replicate the BCD.
Mount ESP with Diskpart and also Repair
You can make use of diskpart to designate a drive letter to the EFI System Partition, after that make use of FixBoot or BCDBoot to execute the repair work. Below are the actions to do so:
- In winRE, choose Troubleshoot > Advanced choices > Command Prompt
- Execute the adhering to commands:
 diskpart
checklist disk - Determine the disk Windows is set up on and also inspect if it has an asterisk [c000000f] or otherwise in the Gpt column If it’s existing, you can proceed with the actions listed below. If there is no asterisk, you must rather inspect the Repair Boot Sector on MBR Disk area at the end.

- Replace 0 with the Windows disk if various and also carry out the adhering to commands:
 sel disk 0
listing vol - From the listing of quantities, locate the UEFI quantity You can identify it by its normal dimension (100 MEGABYTES), FAT32 in Fs area, Boot in the Label area, or System in the Info area.
- The EFI System Partition is Volume 2 on my computer, so we’ll utilize that for guide objectives. Modification it as necessary if your own is various in the actions listed below. Change R: with a drive letter that’s not in usage if required.
- Execute the complying with commands:
 sel vol 2
 appoint letter= R:
- Type
departureas well as press Enter. - Execute the adhering to commands:
 bootrec/ FixMBR
 bootrec/ FixBoot
 bootrec/ ScanOs
 bootrec/ RebuildBcd
- If you’re able to run FixBoot currently, you can quit below. If you’re still coming across the exact same mistake, make use of the commands noted below rather.
- Type the complying with command as well as change R: with the EFI dividing’s letter if various.
cd/ d R: EFI Microsoft Boot - If you obtain a The system can not discover the course defined mistake message, run the very same command on alternate courses:
 cd/ d R:  Boot
cd/ d R: ESD Windows EFI Microsoft Boot - Type
bcdboot C: Windows/ s R:/ f UEFIand also press Enter. - Rename the Boot Configuration Data (BCD) for back-up functions with the adhering to command:
ren BCD BCD.bak - Recreate the BCD with the adhering to command:
Bcdboot C: Windows/ s x:/ f ALL - Type
leaveand also press Enter. - Restart your computer system as well as inspect if you can boot effectively currently.
Delete ESP as well as Use Automatic Repair Tool
The Automatic Repair device is the best alternative to deal with any kind of type of start-up problem. Prior to utilizing it, you need to remove the system dividers to guarantee that a corrupt EFI system dividing (ESP) isn’t the problem. Right here are the actions to do so:
- First, make use of Windows Version 1703‘s ISO to develop a bootable disk or USB.
- Boot from the media as well as choose Repair your computer system

- Select Command Prompt and also usage diskpart to erase the system dividers.

- Now, departure cmd as well as make use of the Startup Repair device.
- Login to your account when triggered to wage the repair service.
- Wait for the automated repair work device to do its work. This will generally take 5– 15 mins on a lot of systems.

If the fixing device deals with the problem, terrific. Otherwise, you’ll see a message along the lines of Startup Repair could not fix your computer. In this instance, pick Advanced Options as well as experiment with the various other services from our overview.
Uninstall Latest Updates
A typical problem that individuals frequently report is that Windows will not boot after an upgrade. In instances such as this, uninstalling the most recent upgrade is normally sufficient to solve the problem. Below are the precise actions to do so:
- In winRE, pick Troubleshoot > Advanced Options > Uninstall Updates

- Select Uninstall Latest Quality Update and also comply with the on-screen directions.
- Repeat the very same actions to uninstall the attribute upgrade.

- Restart your computer as well as inspect if you can boot correctly.
Clean Install OS
If the problem is still not fixed, a tidy reinstall of the OS is most likely the last alternative. This will certainly get rid of whatever from your Computer. If you do not desire to shed your data, you might desire to hold off on this briefly. Right here are the actions to tidy mount Windows:
- Insert a Windows Installation Disk or USB.
- In the arrangement wizard, choose Next > Install Now.
- When motivated for the item trick, choose the Do this later or I do not have an item trick alternative.

- Select the OS Edition, approve the permit terms, as well as choose Custom: Install Windows Only (Advanced)
- Select a drive and also press Delete Repeat this up until there is just one unallocated drive left.

- Select the unallocated drive and also press New > Apply > ALRIGHT
- Select the freshly developed Primary Partition and also press Next

- Windows will certainly currently set up and also your computer might reboot a couple of times throughout the procedure.
Related Questions
How to Repair Boot Sector on MBR Disks?
The code detailed over to fix the EFI bootloader uses just to disks utilizing a GPT dividers table. When it comes to Legacy BIOS or CSM (Compatibility Support Mode), MBR segmenting taste is utilized. You must adhere to the actions detailed below rather:
- Launch winRE Command Prompt.
- Type
bootrec/ RebuildBCDas well as press Enter. - If that does not address the problem, perform the adhering to commands rather:
 X:  boot  bootsect.exe/ nt60 all/ pressure
 bootrec/ FixMBR
 bootrec/ FixBoot
 bootrec/ ScanOs
 bootrec/ RebuildBcd
How to Fix BFSVC Error: Could closed the BCD design template shop. standing– [c000000f]?
First, make certain that you went into the proper command: Bcdboot C: Windows/ s x:/ f ALL
Additionally, if you’re making use of a local variation of Windows, you’ll require to customize the code appropriately. E.g., when it comes to United States localization, change the command thus: Bcdboot C: Windows/ l en-us/ s x:/ f ALL
If still dealing with the very same mistake, the BCD design template shop is most likely corrupt. In this instance, utilizing the SFC and also DISM energies to fix the layout shop initially, after that utilizing the commands from this overview will certainly be handy.
.