
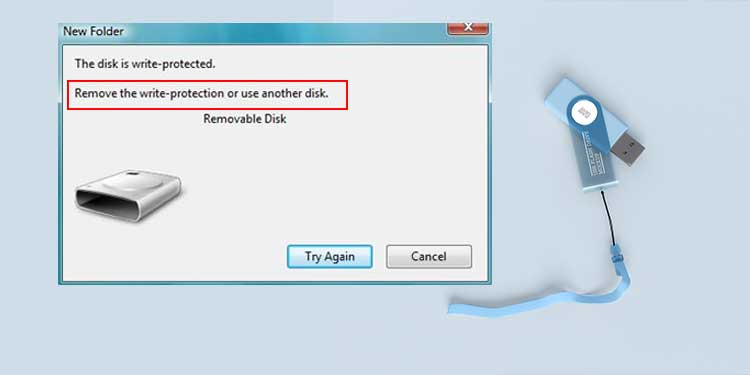
Sometimes, while attempting to replicate documents to the pen drive, you might obtain the mistake message that states, “ The disk is write-protected” When a USB drive is write-protected, it limits customers from making any kind of adjustments to the data as well as folders. We can layout the drive to get rid of any type of write-protection setups, some computer systems do not allow us layout the flash drive itself.
Now, allow us see just how to get rid of compose defense on a USB without additional hold-up. Below is a checklist of points you can attempt to disable the compose defense on a USB.
How to Remove Write Protection on USB?
Here are a couple of basic means you can get rid of the Write Protection on USB drives.
USB With a Lock Switch
Most SD cards as well as USB drives have physical buttons to secure themselves. These buttons are generally found on among the sides of the drive. You could likewise observe “Lock” composed on the front side of the SD card.
When secured, individuals can not compose anything on the drive. This button likewise stops individuals from unintentionally eliminating any type of information inside the USB drive. To disable this attribute, we can merely disable the button literally.
If you do not have a physical button, we can proceed to various other solutions.
Format the Drive
Formatting the detachable drive will certainly get rid of every little thing completely as well as establish all the setups to default. The write-protection setups will certainly likewise go back to the default state. Given that we will erase all information, ensure you backup all your needed documents as well as folders inside the drive prior to beginning the style procedure.
When you attempt to layout, the mistake message may turn up that claims, “ You do not have adequate civil liberties to execute this procedure.” This implies that the individual does not have sufficient opportunities to style this drive. Scroll to Solutions for Windows to repair this problem.
Note: This action might not help all Windows individuals.
For Windows
- Insert the USB drive.
- Right-click on the exterior drive you wish to layout.
- Click Format. An additional dialog box will certainly open up.
- Under File System, pick either FAT32(File Allocation Table 32) or NTFS (New Technology File System).
Note: FAT32 works with all Operating systems and also is the default for all USB drives. Just Windows, MacOS, and also Linux OS assistance NTFS.
- Then, under Allocation dimension systems, select Default allotment dimension.
- Under Format Options, examine or uncheck Quick Format. Quick Format does not get rid of the information, as well as we can recuperate removed data. Unchecking Quick Format will certainly get rid of every little thing as well as normally takes a couple of mins.
- Click on Start.
For MacOS
- For MacOS, when you place the USB drive, it will certainly be shown on the desktop computer.
- Now, click the search symbol in the leading right edge.
- Search for “ Disk Utility” without the quote mark as well as click Disk Utilities.
- From the checklist showed on the left side, choose your USB drive.
- Click on Erase on top.
- Now, kind a name for the drive choose Format as MS-DOS (FAT).
- Then click Erase
- After the procedure is total, click Done
For Chromebook
- Click on Apps and also most likely to Files You can additionally push the Alt + Shift + M tricks on the key-board.
- Right-click on the drive you wish to style and also choose Format Device
- Click OKAY and also wait on the procedure to finish.
How to Remove Write Protection on USB on Windows?
We have actually provided a few of Windows certain solutions that you can attempt to get rid of the write-protection.
Disable Deny Write Access
The Local team plan function in Windows Pro as well as Enterprise Edition has accessibility to numerous attributes, consisting of detachable disk gain access to. Utilizing the Local Group Policy Editor, an admin can customize accessibility attributes for several customers and also computer systems throughout a network setting.
Unfortunately, the Local Group Policy Editor will certainly not be offered on Windows Home Edition. We can obtain the Policy Editor by running a Group Editor set data which will certainly make it possible for the Group Policy.
Follow these actions to Enable Group Policy on Home version.
Note: you do not require to comply with these actions if you are utilizing Professional or Enterprise variation.
- Download the set data.
- If your internet browser provides you some caution, overlook them. As set (. bat) data are system data, the web browser will certainly alert that this sort of data might damage the OS itself.
- Double-click on the data you simply downloaded and install and also allowed the command run.
- Once every little thing is total, your computer system can access the Local Group Policy Editor
How to Disable Deny Write Access?
Follow these actions to disable Deny Write Access attribute.
- Press the Windows + R trick to open up Run
- Type “ gpedit.msc” without the spelling mark as well as press Enter
- Local Group Policy Editor dialog box will certainly open up. Below, on the left side, Under Computer Configuration, click Administrative Template > Removable Storage Access

- Double-click on Removable Disk: Deny Write Access on the appropriate area of the dialog box.
- Another dialog box called Removable Disks: Deny compose accessibility will certainly open up.

- Ensure that the check box is either readied to Not Configured or Disabled
- Once you make the modifications, click Apply, after that ALRIGHT
Bonus Tip: You can deal with the majority of the authorization concerns from Group Policy Editor.
Using Diskpart Command
The Diskpart handles all the storage space that the computer system finds. We can utilize this command to handle dividers of all storage space gadgets attached to the computer system. It can additionally handle create security setups, produce, remove or combine dividers.
Follow these actions to disable create defense utilizing Diskpart.
- Press the Windows+ R secret.
- Type “ cmd” without the quote mark and also press Ctrl+ Shift + Enter to run Command Prompt as manager.
- Now, kind “ diskpart” and also press Enter
- To detail out all the storage space tools linked to the computer system, kind “ listing disk” and also push go into.
- You will certainly see all the storage space called Disk 0, Disk 1, Disk 2, and more, together with their information.

- Here, situate your detachable drive from the Size columns. Your USB drive’s dimension should match among the disks from the listing.
- Type ” pick disk X” where X is the disk variety of the detachable disk.
- Type “ connects disk clear readonly” without the quote mark as well as press Enter.
- Wait for the command to eliminate the create defense. When the procedure is total, kind “ departure” as well as press Enter
- Restart your computer system to conserve the adjustments.
Try duplicating some documents onto the USB. Proceed with the following action if this remedy does not benefit you.
Edit the Registry Configuration
The Registry Editor permits individuals to modification data source worths saved in Windows. As the compose defense worths are likewise saved in the Registry, we can control these worths to eliminate the compose security.
However, incorrect adjustments in the Registry might harm the OS itself. Transforming the complying with worths will certainly not influence your computer system, check out every action extremely meticulously prior to making any type of adjustments.
Before we begin, it is suggested to backup the Registry setups if we make any type of incorrect modifications.
- Insert the detachable drive right into your computer system.
- Press the Windows secret + R as well as kind “ regedit“

- Now, browse to the adhering to area from the left panel of the Registry Editor.
Computer SYSTEM CurrentControlSet Control StorageDevicePolicies - Double-click on StorageDevicePolicies There must be a product on the checklist called “ WriteProtect” on the ideal panel.
- Double-click on “ WriteProtect” and also established Value Data to “ 0.“

- Click OK to conserve the modifications.
- Restart your computer system to use those modifications.
If the StorageDevicePolicies is missing out on, we require to include this folder as well as “ WriteProtect” together with its worth. Adhere to these actions if StorageDevicePolicies are missing out on.
- Right-click on Control(from
Computer SYSTEM CurrentControlSet Controlin Registry Editor) - Click on New > Key

- Rename the produced folder as “ StorageDevicePolicies“.
- Now, right-click “ StorageDevicePolicies” as well as click New > DWORD (32— little bit) Value

- Name the entrance as “ WriteProtect“.
- Double-click WriteProtect as well as established the Value Data to “ 0“.
- Click OKAY to conserve the adjustments.
- Restart your computer system to use modifications.
After we reactivate the computer system, all create accessibility.
Turn off Bitlocker
Bitlocker in Windows secures your information to make sure that unapproved customers can not access them. If the USB drive is secured with BitLocker, we require a password to gain access to these information or switch off the attribute. If a detachable drive is secured with BitLocker, it is shown by a lock symbol.
Although we can not access the drive unless we have a password, we can layout the drive to eliminate this attribute. Formatting the drive will completely remove every data as well as folder inside it.
Please adhere to these actions to Turn off BitLocker.
- Insert the USB Drive and also right-click the detachable drive from File Explorer.
- If you are utilizing Windows 11, click Show a lot more alternatives If you are making use of Windows 10, disregard this action as well as remain to tip 3.
- Click on Manage Bitlocker

- Under your Removable information drives, click Turn off Bitlocker

- Another dialog box will certainly open up. Below, click Turn off BitLocker

It might take a couple of mins, relying on the dimension of the USB drive.
How to Remove Write Protection on USB on MacOS?
Here are a couple of solutions we can attempt to get rid of create security in macOS.
Repair Disk Permission
Permission setup in the MacOS can in some cases quit you from replicating a documents onto the USB drive. For MacOS, although formatting the USB drive is a sensible choice, you can make use of the Disk Utility attribute to reset the approval on your detachable disk.
Follow these actions to fix Permission setups.
- Insert the USB Device.
- Click on the search symbol and also look for “ disk energy” without the quote mark on the top-right edge.
- Click on the initial search results page called Disk Utilities
- Select the detachable drive you wish to fix and also click the First— help tab.
- Click on Repair Disk Permissions
In the current variation of MacOS, Apple has actually gotten rid of the Disk Utility function to Repair Disk Permission. We can utilize the Terminal. Comply with these actions to Repair Disks Permission.
- Click on File situated on the leading left side of the desktop computer.
- On the Finders home window, click Applications
- Scroll down as well as open up the Utilities folder.
- Open Terminal application
- Now, kind the adhering to command.
diskutil resetUserPermissions/ 'id -u'
The over command will certainly reset any type of read or create consent on all your storage space tools
If the above command does not function, attempt running the complying with command.
sudo diskutil resetUserPermissions/ ‘id -u’
The “ sudo” command will certainly run any kind of command with superuser opportunities and also it means Super Do.
Restart your computer system to conserve adjustments.
If both commands do not function, we can additionally make use of the repairVolume command to deal with any type of problem. Adhere to these actions to fix your detachable drive.
First, we require to recognize the disk number (instance: disk2l1) that the computer system has actually designated to your detachable drive. For this, kind “ diskutil listing“. Currently, according to the dimension, discover your detachable drive.
If you can not locate the disk number, kind diskutil details “USB’s name”|grep Node(Replace USB’s name with the name of your detachable drive). Currently, keep in mind the node offered by this command. Instance/ dev/disk2l1.
Once you recognize the disk number, kind the complying with command.
sudo diskutil verifyVolume/ dev/disk2l1
sudo diskutil repairVolume/ dev/disk2l1
When inputting the above command change the/ dev/disk2l1 with the result from the previous command.
Related Question
How to Disable/Enable Write Protection on a File?
If you can not change material inside a documents, after that perhaps your data gets on read-only setting. To enable/disable create defense or read-only setting on a documents, we require to alter the feature’s worth of a data. Comply with these actions to alter the characteristics of a documents.
- Right-click on the documents that you wish to enable/disable compose shield.
- Click on Properties
- On Attributes, check or uncheck Read— just depending upon what you wish to do. If you’re going to conceal a data, you can examine Hidden
How to Add Write Protection To a USB Drive?
To include Write Protection to a USB Drive, follow this procedure.
- USB physical button.
- Using diskpart command
- Changing particular computer registry worths Registry Editor.
- Enable Deny Write Access from Group Policy Editor.
.