
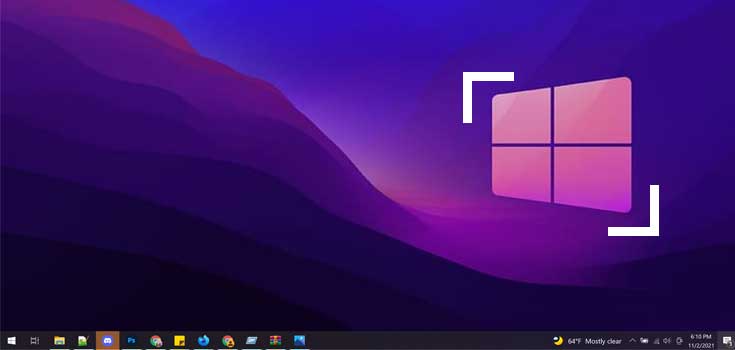
There are countless approaches for taking a screenshot in Windows11 Many individuals never ever look past the fundamental Print Screen alternatives.
For instance, did you recognize that Windows consists of a terrific device called Snip & Sketch? It enables you to take even more professional-looking screenshots. You can additionally include comments to your screenshots and also modify them with the Snip & Sketch picture editor. You can access this device by pushing “ Windows + Shift + S“
In this post, we will certainly review this device, to name a few.
How to Take A Screenshot on Windows 11
Print Screen and also Paste
The initial and also the most prominent means of taking screenshots on Windows 11 is by utilizing the Print Screen trick You will certainly discover the Print Screen vital (generally identified PrtScr or something comparable) on top right-hand side of your key-board.
Follow these actions to take a screenshot:
- Press the Print Screen essential( Prt Scr) This will certainly take a picture of the whole display as well as wait to the clipboard.
- Open MS Paint(or any kind of photo editing and enhancing device of your option). Paste the screenshot you drew from the clipboard (pushing Ctrl+ V). You can likewise paste the screenshot in other places straight (Messaging App, Word etc.).

- Crop the photo as required. (In MS Paint, you might make use of the Select device to choose a part of the display you wish to conserve. Merely choose a part as well as press Ctrl+ C Open up a brand-new data and also press Ctrl+ V to paste the choice.)

- Save the documents.
While using Print Screen as well as paste might be one of the most prominent method of taking screenshots, it isn’t one of the most hassle-free. Windows 11 uses some easier methods of doing this.
Windows + Print Screen
If you do not require to chop the screenshot after you’ve taken it, there is a far more less complicated means to deal with this.
Pressing Windows + Print Screen will straight conserve your screenshot as a photo data in the Screenshots folder of the Pictures directory site in Windows.
Alt + Print Screen
If you do not require a screenshot of the whole display and also you’re simply aiming to take a screenshot of the energetic Window, there is a simple method to do this.
Pressing Alt + Print Screen will certainly take a screenshot of the energetic home window as well as wait to the clipboard. You will certainly after that require to open up MS Paint (or any type of photo modifying device of your option, paste the shot as well as conserve the documents as in the past.
Saving Screenshots Automatically to OneDrive
If you’re seeking to utilize, watch or share the screenshots you take across numerous tools, after that Windows 11 uses the alternative to conserve your screenshots instantly to OneDrive. OneDrive is Microsoft’s cloud storage space system that allows you conserve your documents and also see them on any type of gadget.
To instantly conserve your Screenshots to OneDrive, adhere to these actions:
- Click on the little cloud symbol for OneDrive on the right-hand man edge of the taskbar. Click Help & Settings > Settings

- In the Microsoft OneDrive home window that opens up, click the Backup tab.
- Under Screenshots, examine package alongside “ Automatically conserve screenshots I record to OneDrive“.

- Click OK.
Now, you can either make use of Print Screen to instantly conserve a screenshot of the whole display to OneDrive, or Alt + Print Screen to conserve a screenshot of the energetic home window.
Snip & Sketch Tool
Windows 11 features an excellent integrated screenshot-taking device called Snip & Sketch With this device, you can take screenshots in 4 various types: Rectangular, Free-form, Window and also Full-Screen.
The Rectangular setting allows you drag your computer mouse throughout a rectangle-shaped area of the display that you wish to record. The Free-form setting allows you choose any kind of free-hand area of the display. The Window setting allows you pick a specific home window and also plants whatever outside it. The Full-screen setting takes a screenshot of the whole display.’
To utilize the Snip & Sketch Tool, adhere to these actions:
- Activate the Snip Tool, by pushing Windows + Shift + S
- Select the proper setting as well as utilize your computer mouse to catch the screenshot.
- Once the screenshot is recorded and also conserved to the clipboard, a little alert box shows up under appropriate edge of the display. If you click this notice, it will certainly open up the Snip & Sketch editor

- You can utilize the Snip & Sketch editor to annotate, highlight or scribble over the screenshot you recorded.

If you like the Snip & Sketch device, you can additionally established the Print Screen crucial to trigger the Screen trimming device by default To do this, comply with these actions:
- Click on Start, kind Settings as well as click it.

- In Settings, discover and also pick Accessibility from the food selection on the left hand side.
- In Accessibility, scroll to discover as well as pick Keyboard
- In Accessibility > Keyboard, scroll to the On-screen key-board, accessibility tricks as well as Print display area. Toggle on “ Use the Print display switch to open up display clipping“.

Game Bar to Take a Video of the Screen
Another integrated Windows 11 function that can be utilized to take screenshots is the Game Bar. While the screenshot attribute of the Game bar is rather standard, the cooler attribute it uses is the choice to take a video clip of the display.
To utilize the Game Bar to take screenshots/videos, adhere to these actions:
- Activate the Game Bar by pushing Windows + G
- You will certainly locate a box classified Capture on the leading left edge of the display.
- If you push the Camera symbol, it will certainly take a screenshot of the whole display and also wait to the clipboard (sort of like pushing Print Screen).
- If you push the Record switch, it will certainly begin tape-recording a video clip of the display. If you push the microphone switch alongside it, it will certainly begin taping the sound as well. You might straight push Windows + Alt + R to begin tape-recording a video clip of the display without triggering the Game Bar.

The screenshots and also the video clips are instantly conserved to the Gallery. You can access them by clicking “ Show all captures“.
Free Third-Party Application: LightShot
We’ve considered all the indigenous methods you can take a screenshot on Windows11 Currently, allow us consider just how you can take a screenshot on Windows 11 utilizing a complimentary third-party application called LightShot
Follow these actions to set up LightShot:
- Download LightShot from its main site.

- Open the arrangement documents and also provide it the essential consents.
- Choose English as the language and also click OK.

- Select “ I approve the arrangement” and also click Next.

- Once the installment is full, click Finish. This need to likewise instantly release LightShot in your computer system. Look for the LightShot logo design at the best edge of the taskbar.

Once the application is mounted, adhere to these actions to take screenshots:
- Make certain LightShot is running.
- Press Print Screen( Prt Scr) The display will certainly lower. While pushing the left computer mouse switch, drag it throughout the display. LightShot will certainly provide you with a number of choices in 2 various toolbars: an upright one with 8 choices as well as a straight one with 7 choices.

- The very first alternative on the upright toolbar is the pen device The pen device allows you doodle or scribble in the screenshot location. The density of the pen can be altered utilizing the computer mouse wheel.

- The 2nd alternative on the upright toolbar is the line device You can utilize this alternative to attract a straight line within the chosen screenshot location. You can likewise transform the density of the line making use of the computer mouse wheel.

- The 3rd device on the upright toolbar is the arrowhead device This device can be utilized to attract arrowheads within the chosen location. You can transform the density of the arrowheads utilizing the computer mouse wheel.

- The 4th device on the upright toolbar is the Rectangle device You can utilize it to attract a rectangular shape within the picked location. The density of the rectangular shape can additionally be transformed utilizing the computer mouse wheel.

- The 5th device on the upright toolbar is the Marker device You can utilize it to highlight the essential sections of the picked location. The dimension of the marketplace can be altered making use of the computer mouse wheel.

- The 6th device on the upright toolbar is the Text device You can utilize it to compose something inside the chosen location. The dimension of the message can be altered utilizing the computer mouse wheel.

- The 7th and also 8 device on the upright toolbar are the Color and also Undo choices You can utilize the shade alternative to transform the shade of your pen, line, arrowhead, rectangular shape, pen or message. The reverse device allows you go back the adjustments you’ve made.
- The initial alternative on the straight toolbar allows you upload your screenshot to prntscr.com It creates a web link that you can show any individual or open up on any kind of various other gadget. In this manner you can quickly share your screenshots.


- The various other 6 alternatives allow you share your screenshot on social networks (Twitter, Facebook, VK or Pinterest), look for comparable pictures on Google, publish the screenshot, duplicate the screenshot to the clipboard, conserve the screenshot as a photo documents or terminate the screenshot specifically. You can push Ctrl + C to duplicate the screenshot to the clipboard.
.