
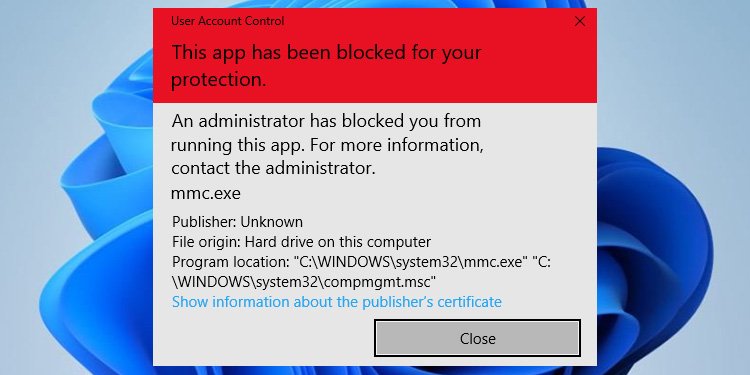
The ‘ This application has actually been obstructed for your security‘ timely shows up when your system’s listing of relied on authorities does not consist of the electronic trademark of the application.
It is a protection attribute to secure your system from injury. The application you desire to make use of might really be safe.
So, allow’s proceed to the factors and also feasible services for this problem.
Reasons for ‘This App Has Been Blocked for Your Protection’ Error
Here are a few of the feasible factors for the User Account Control motivate to show this mistake message:
- Expired or withdrawed Digital Signature of application.
- Outdated Trusted Root Certificate Authority listing.
- Improper procedure of Cryptographic Services.
Solutions for ‘This App Has Been Blocked for Your Protection’ Error
You experience this mistake when your system obstructs applications from untrusted resources. You can either alter the consent setups or upgrade the relied on authorities checklist to consist of the electronic trademark of the application to solve this problem.
Apart from that, there might likewise be various other approaches you can take depending upon the specific root cause of the mistake. Try the feasible services pointed out listed below as well as see if they verify efficient.
Unblock File in Properties
It is highly likely that your system will certainly obstruct any type of documents you download and install from the net straight. You can conveniently unclog the documents from its residential properties. To do so,
- Go to the data that reveals this mistake.
- Select it and also press Alt + Enter to open its Properties
- Near all-time low of the General tab, you will certainly see an unattended Unblock box.
- Click on it to examine the alternative as well as pick Apply as well as Ok

Now attempt running the data as well as inspect if the mistake continues to be.
Open With Command Prompt
It is feasible to release the data making use of the raised Command Prompt to bypass the mistake. To do so,
- Go to the data, pick it as well as press Ctrl + C to replicate it.
- Then, look for Command Prompt in the search bar.
- Choose Run as manager from the best area of the search bar.
- Press Ctrl + V It pastes the data’s course as a command. For older Windows variations, you’ll require to by hand kind the data course.
- Press Enter to run the documents.
Disable Windows Defender SmartScreen
Windows Defender SmartScreen is a protection attribute to safeguard your system. We do not advise disabling it, however you can do so if you think the application it is obstructing to be safe.
However, make certain to re-enable this attribute when you quit utilizing the application.
Here’s just how you can Disable Windows Defender SmartScreen:
- Open Settings by pushing Win + I as well as most likely to Update & Security
- Click on Windows Security as well as choose Open Windows Security
- Go to App & internet browser control and also click Reputation based security setups under Reputation-based security.
- Set all the choices to Off.

Then, open up the documents revealing the “This application has actually been obstructed” punctual and also examine if you can release it this moment.
Disable UAC Setting in Group Policy
The UAC setups are additionally there for your system’s security. Comparable to the previous technique, disable such establishing just to run the application as well as allow it later on.
Here are the actions to gain access to as well as disable the pertinent plan:
- Open the Run command as well as go into
gpedit.mscto release the Local Group Policy Editor. - Go to Computer Configuration > Windows Settings > Security Settings > Local Policies > Security Options
- Look for and also double-click on Run all managers in Admin Approval Mode

- Check Disabled as well as hit Ok
You can additionally disable this setup via the Registry Editor. To do so, browse to Computer HKEY_LOCAL_MACHINE SOFTWARE Microsoft Windows CurrentVersion Policies System as well as established the worth of EnableLUA as 0.
If you experience this mistake while utilizing Computer Management in MCM, alter the complying with plan also:
- Go to User Configuration > Administrative Templates > Windows Components > Microsoft Management Console > Restricted/Permitted snap-ins on the Group Policy Editor.
- Locate as well as double-click on Computer Management
- Check Not Configured as well as hit Ok
Restart your computer and also inspect if the mistake continues.
Update/Reinstall Application
Some applications will certainly upgrade their electronic trademarks after they are ended. Make certain to upgrade the application to the most recent variation. Record the mistake to the supplier if no later updates are offered. You can additionally make use of different applications in the meanwhile.
You can likewise attempt re-installing the application if you have the most up to date variation. Often the application can have insects that make your system error its electronic trademark as unapproved.
To update/reinstall the application,
- Launch the Run command as well as go into
appwiz.cplIt will certainly guide you to the Uninstall Program device in Control Panel. - Search for as well as pick the application with the mistake as well as choose Uninstall or Uninstall/Change > Uninstall

- Then download and install the current installer from the main internet site as well as mount the program.
Configure Cryptographic Services
One of the jobs of Cryptographic solutions is to validate the electronic trademark. You will certainly experience this mistake if this solution is not running. Adhere to the guidelines listed below to set up the solution.
- Open Run.
- Type and also go into
services.msc - Search for Cryptographic Services as well as double-click on it.

- Set the Startup kind to Automatic and also click Ok.
- Then, press Win + X as well as choose Windows PowerShell (Admin)
- Enter the adhering to commands:
 Stop-Service cryptsvc
 Rename-Item -Path "C:  Windows  System32  catroot2" -NewName catroot2.old
 Restart-Computer
After rebooting, attempt introducing the documents once more as well as inspect if the mistake solves.
Restore System File Integrity
You can likewise attempt running the SFC as well as DISM devices to bring back the stability of your system submits when you experience this mistake in Microsoft applications. They have actually been recognized to deal with the concern sometimes. Also if they stop working to do so, there will certainly be no damage to your system.
Update Operating System
Your system additionally obstructs applications for security as a result of the wrong arrangement of solutions. These typically look like pests in a system or an expert construct. You can conveniently debug this problem by setting up system updates as quickly as they are readily available.
Updating OS additionally updates root certifications, as well as brand-new electronic trademarks might end up being licensed.
Check Automatic Root Certificates Update
By default, your system will instantly upgrade origin certifications when it comes across an untrusted resource or throughout a system upgrade. You might have unconsciously handicapped such a setup. You can repair this concern by adhering to the guidelines listed below:
- Open the Local Group Policy Editor
- Navigate to Computer Configuration > Administrative Templates > System > Internet Communication Management > Internet Communication setups
- Look for and also double-click on Turn off Automatic Root Certificates Update
- Check Not Configured or Disabled as well as click Ok.
Restart your computer and also attempt releasing the data once more.
Perform System Restore
If you all of a sudden began experiencing this mistake on a formerly obtainable application, you can attempt recovering your system to an ideal recover factor. This approach will certainly eliminate all the mistakes that took place later.
Follow the actions listed below to recover your system:
- Open the Run dialog box and also go into
systempropertiesprotectionIt will certainly guide you to the System Protection tab of System Properties. - Click on System Restore to start the procedure.

- Select an appropriate recover factor as well as comply with the on-screen guidelines.
.