
A laptop computer without a fee has to do with as valuable as a block. Your Chromebook not billing does not immediately suggest the equipment itself is bricked.
Make certain to power it off as quickly as you observe it’s not taking a cost to ensure that you can utilize a few of the continuing to be battery to repair.
Chromebook Charging Methods
All Chromebooks feature a power line that links into an outlet as well as bills the battery in this way. If the cable television, the battery, or the tool itself has a problem relating to power shipment and also upkeep, after that it might quit taking a cost.
One point to keep in mind as you service repairing a billing trouble in any type of tool is that the much more factors of failing there remain in your billing configuration, the even more opportunities there are that another thing is having a concern.
Always work with repairing your Chromebook with the OEM battery charger connected straight right into the wall surface to ensure prospective troubles are removed.
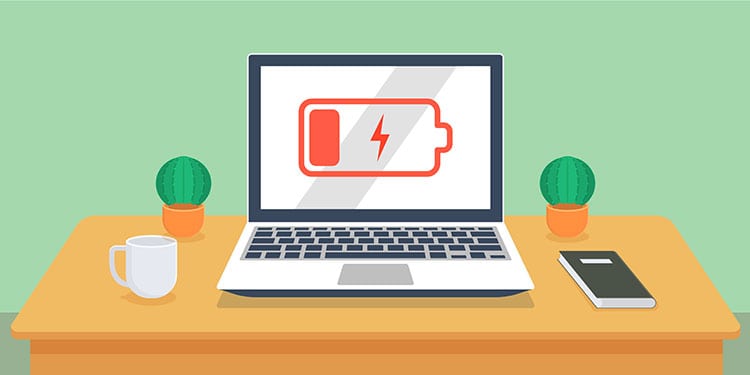
Why Won’t My Chromebook Charge?
Don’t worry if you discover your tool isn’t taking a fee. Also if it’s totally out of power, there are actions you can require to attempt to deal with the issue.
Of program, it’s simpler to repair what’s incorrect if there’s still some juice in the battery, and also you can access the Chromebook’s setups.
Discharge examination
A battery discharge examination is one method to see whether your battery and also battery charger are functioning properly. This is specifically practical if you’re able to bill the computer system at times yet not at others.
- Press Control + Alt + T to open up Crosh
- Type “
battery_test _10” without quotes. This will certainly examine your system for 10 secs.
- Press Enter
- Read the info that turns up on the display.
You can see the battery wellness as well as portion, however down further is the discharge examination. This determines exactly how quick the battery will certainly release while the computer system remains in usage.
If the discharge number appears extremely high, it indicates there is likely an issue with either the battery or the battery charger. If it’s greater than 0.1 percent after 300 secs, you may intend to connect to technological assistance to see if there’s a trouble with among your system elements.
Diagnostics
You can obtain comparable details from examining the diagnostics. If you favor to watch your battery info in this manner, it’s important to recognize just how to open it.
- Click the moment on the reduced ideal side.
- Choose Settings
- Choose About Chrome OS
- Click Diagnostics
- Click Run Discharge Test

Look at your battery wellness. If it’s very reduced– like listed below 40 percent– it might discuss why you’re having concerns. Then, your battery likewise will not last long without the battery charger. It may be time to change the battery if the health and wellness is reduced.
Charger Issues
First, inspect to see whether you can attach your battery charger in a different way. There are a couple of approaches you can attempt to make it function.
- Unplug the battery charger from the Chromebook and also wall surface. Different both components of the power cable. As soon as every little thing is out, wait 5 mins and also locate a brand-new electrical outlet in your room. Plug in an additional tool that you can see is obtaining power to confirm that the electrical outlet functions.
- Plug both components of the power cable back right into each various other.
- Plug the battery charger right into the wall surface.
- Plug in the Chromebook.
- Walk away for 30 mins. When you return, appearance as well as see whether it’s taking a cost.
You can attempt this repair also if you do not have power. Beginning with it isn’t an excellent suggestion if you still have a cost on the Chromebook. Wait to do this action up until after you’ve inspected the software application.
If you’re questioning whether the battery charger is the problem as well as your Chromebook has a USB-C port, attempt billing it with a USB-C cord rather.
- Plug in the USB-C cord to your Chromebook.
- Click the time
- Click Settings
- Choose Power from the Device food selection.
- Choose the port you’re trying to bill with.

As long as the various other battery charger is eliminated as well as the USB-C is linked into an operating source of power, you must see the fee begin functioning immediately. If it does not, after that possibilities are your battery charger is excellent and also another thing is incorrect.
Some Chromebook versions likewise have actually an LED light that activates if the gadget is obtaining a cost.
Hard Reset
A tough reset freshens your Chromebook without eliminating your regional data or setups. It’s a rapid means to guarantee that no mistakes or damaged data stop your Chromebook from billing.
- Turn off the Chromebook. Allow it power down entirely prior to continuing.
- Press and also hold the Refresh switch.
- Tap the Power switch without launching the Refresh switch.

- Wait up until the computer system launches, and after that launch the Refresh switch.
Different versions could need an additional approach. There are numerous to attempt.
- Remove the power adapter while the Chromebook is off. After a number of secs, connect it back in as well as power it on.
- Remove the battery as well as adapter, after that change them. Transform the Chromebook back on.
- Use a paperclip or needle to push the Reset switch under of the Chromebook while it’s shut off as well as unplugged. Hold the switch down while you reconnect the adapter as well as reboot the maker.
Check with your maker to see which approach puts on your design.
Battery Issues
If you’ve examined your battery diagnostics and also are seeing favorable outcomes, you most likely do not have a battery concern. If you do, however, it isn’t as very easy to secure your battery on a Chromebook as it gets on a few other laptop computers. You need to eliminate components of the Chromebook to access it.
Gather the appropriate screwdrivers for your design as well as a pry device to change the battery.
- Let the battery completely release if you’re able prior to you start. Eliminate the battery charger from the laptop computer.
- Unscrew the screws on the back panel of the Chromebook. They need to line the sides as well as remain in the panel’s center. Ensure you obtain them all. Establish them apart in a location where you’re not most likely to shed them.

- Use a lever or shim device to get rid of the back panel from the Chromebook carefully. Job it right into the gap in between the panel as well as the body and afterwards utilize light stress to relocate up.
- Once the panel is eliminated, utilize the very same device to eliminate the battery port carefully. It appears like a various colored collection of cords that links into a strong tinted adapter with a coordinating plastic head.
- Unscrew both screws holding the battery to the Chromebook.

- Lift the battery out of the Chromebook and also established it apart.

- Set the brand-new battery in position as well as screw it right into the laptop computer’s body. You need to have the ability to utilize the very same screws you utilized with the old battery.

- Connect the cable right into the exact same port the old battery connected into.
- Snap the back panel right into location and also change the screws. When you’re done, connect the laptop computer right into the battery charger, the battery charger right into the wall surface, as well as leave the Chromebook to bill for at the very least 30 mins.
Steps might differ a little relying on the version. Constantly try to find missing out on screws that have not been gotten rid of yet prior to compeling a panel off of the Chromebook.
Hardware Issues
If you possibly require to call your maker if a brand-new battery, a various battery charger, and also dealing with the software application really did not address your problem. Various other parts in the Chromebook might be harmed as well as require substitute.
Your service warranty might cover the damages maintaining the Chromebook from billing. If it does not, or you no more have a service warranty, look for a service center with insurance policy and also a job assurance.
Choosing Replacement Parts
When you change the battery or the air conditioning adapter, it’s vital to try to find one for your certain Chromebook. There are a lot of various versions with small modifications that you have to match the substitute components to your specific Chromebook.
Don’t simply examine the trademark name of your Chromebook. Ensure that you take notice of the design when you order substitute components.
Frequently Asked Questions
What Does It Mean When Your Chromebook Won’t Turn on or Charge?
If no troubleshooting aids your Chromebook start to bill or activate, there are possibly equipment troubles you require to deal with. That is a much more intricate procedure that needs to likely be dealt with by a computer system fixing expert.
How Do I Know if My Chromebook A/c Adapter Is Working?
You can evaluate out one more one to see if it functions to bill the Chromebook. If it does, your own is damaged. You can additionally buy a multimeter and also utilize it to check the air conditioner adapter.
Is There Another Way to Charge My Chromebook?
You can make use of an a/c adapter or a USB-C wire. If you’re utilizing the USB-C cord, you can additionally bill it from one more tool like an additional laptop computer or a phone, if required.
.